728x90
반응형
Maven Jgitflow plugin 은 Maven command를 통해서 Git flow를 수행하는 Plugin이다. Git flow의 간단한 설명은 아래 문서를 참고하자.
2022.01.18 - [CI&CD] - Git-flow 란?
Git-flow 란?
Giflow is an alternative Git branching model that involves the use of feature branches and multiple primary branches. Git flow는 Git branching model로서 Git으로 관리되는 Branch 들의 관리방법을 정의..
corono.tistory.com
Maven Jgit flow는 아래와 같은 Feature를 가지고 있다.
Features
- starting a release - creates a release branch and updates pom(s) with release versions
- Release branch를 생성하고 Pom 파일에 Release version을 업데이트 한다.
- finishing a release - runs a maven build (deploy or install), merges the release branch, updates pom(s) with development versions
- Maven build를 수행하고, Release branch를 mater로 머지하고 develop branch에 Snapshot version을 업데이트 한다.
- starting a hotfix - creates a hotfix branch and updates pom(s) with hotfix versions
- Hotfix branch를 생성하고 Pom 파일에 Hotfix version을 업데이트 한다.
- finishing a hotfix - runs a maven build (deploy or install), merges the hotfix branch, updates pom(s) with previous versions
- Maven build를 수행하고, Hotfix branch를 mater로 머지하고 버전을 업데이트 한다.
- starting a feature - creates a feature branch
- Feature branch를 생성한다.
- finishing a feature - merges the feature branch
- Feature branch를 머지한다.
이 문서에서는 많이 사용하는 `Starting a release` 와 `Finishing a release` 에 대해서 알아보도록 하겠다.
Plugin 추가
우선, Plugin을 설치해보자. Pom 파일에 추가한다.
<properties>
	<!-- Jgit Configuration -->
    <git.user> </git.user>
    <git.password> </git.password>
</properties>

<plugin>
    <groupId>external.atlassian.jgitflow</groupId>
    <artifactId>jgitflow-maven-plugin</artifactId>
    <version>1.0-m5.1</version>
    <configuration>
        <!-- For specific plugin configuration options,
        see the Goals documentation page -->
        <username>${git.user}</username>
        <password>${git.password}</password>
        <flowInitContext>
            <masterBranchName>main</masterBranchName>
            <developBranchName>develop</developBranchName>
        </flowInitContext>
        <autoVersionSubmodules>true</autoVersionSubmodules>
        <enableSshAgent>true</enableSshAgent>
        <noDeploy>true</noDeploy>
        <pushReleases>true</pushReleases>
        <pullDevelop>true</pullDevelop>
        <pullMaster>true</pullMaster>
        <scmCommentPrefix>[RELEASE] </scmCommentPrefix>
    </configuration>
</plugin>
Plugin 이외에 몇가지 Configuration을 추가하였다.
- username / password - Git repository의 접속 Auth 정보를 입력한다. 나의 경우에는 Command line parameter로 계정 정보를 넘겨 줄 것이기 때문에 Properties에 실제 Auth 정보를 넣지 않았다.
- flowInitContext - master branch와 develop branch의 이름을 넣어준다. Github이 최근 master branch 이름이 main으로 변경되어서 main으로 바꿔 주었다.
- autoVersionSubmodules - 자동으로 버전의 입력시켜준다. False로 설정할 경우 사용자가 버전을 명시해 주어야 한다.
- enableSshAgent - SSH agent를 Enable 한다.
- noDeploy - Deploy는 하지 않는다.
- pushReleases - Release branch를 remote stream에 push 한다.
- pullDevelop - Jgitflow가 초기화 되었을 때 develop branch를 pull 한다.
- pullMaster - Jgitflow가 초기화 되었을 때 master branch를 pull한다.
- scmCommentPrefix - Jgitflow 동작 중 변경사항을 저장시에 Prefix를 붙인다. (Release만 사용할 것이기 때문에 [Release]를 붙이도록 하였다.
이렇게 추가를 하고 pom.xml을 다시 Reload를 하면 끝이다.
Maven Command 설정
Release start
$ -Dgit.user=<username> -Dgit.password=<password> jgitflow:release-start -Dmaven.test.skip=true -Dmaven.javadoc.skip=true
Release finish
$ -Dgit.user=<username> -Dgit.password=<password> jgitflow:release-finish -Dmaven.test.skip=true -Dmaven.javadoc.skip=true
실행결과
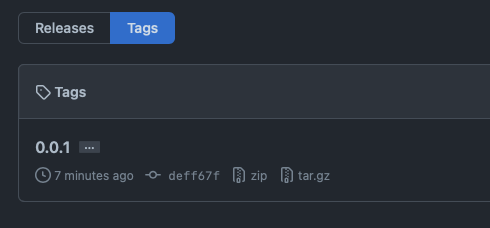
아래와 같이 Github repository에 Release 가 되었고 Tagging이 되었다.
728x90
반응형